
AI Image Generation: Stable Diffusion for Designers

Updated: 2 days ago

UID University 365 Institute of Design
Series Creative Tech Series | Level Basic (Free)
Duration 15 to 20 minutes | Access Free
Digital Design, UX/UI, Visual Communication, Motion Graphics, Creative Technology

UNOP Sound (University 365 Neuroscience Oriented Pedagogy)
Take five minutes to prepare your brain. Play the isochronous tone track (40Hz gamma frequency) with your eyes closed. Gamma-frequency tones before a learning session raise attention and make the material easier to absorb.
[Audio player: UNOP Pre-Lecture Isochrone (40Hz, 5 minutes)]
Table of Contents
The Hook: Why Designers Need Stable Diffusion
You open your design brief at 9 AM. The client wants 20 product mockups in different environments, three brand concept explorations, and a set of illustrations for a new landing page. The deadline is Friday. Your traditional workflow says this takes two weeks.
Stable Diffusion changes the math. Not by replacing your design judgment, but by compressing the hours between concept and iteration from days to minutes. A designer who understands how to steer a diffusion model can produce 50 visual directions before lunch, then spend the afternoon refining the three that actually work.
The question is not whether AI image generation belongs in your toolkit. In 2026, it already does. The question is whether you understand it well enough to control it, or whether you are still typing vague prompts and hoping for the best.

What Stable Diffusion Actually Is
Stable Diffusion is an open-source latent diffusion model that generates images from text descriptions. Stability AI released the first version in 2022, and the ecosystem has grown into the most customizable image generation platform available to designers.
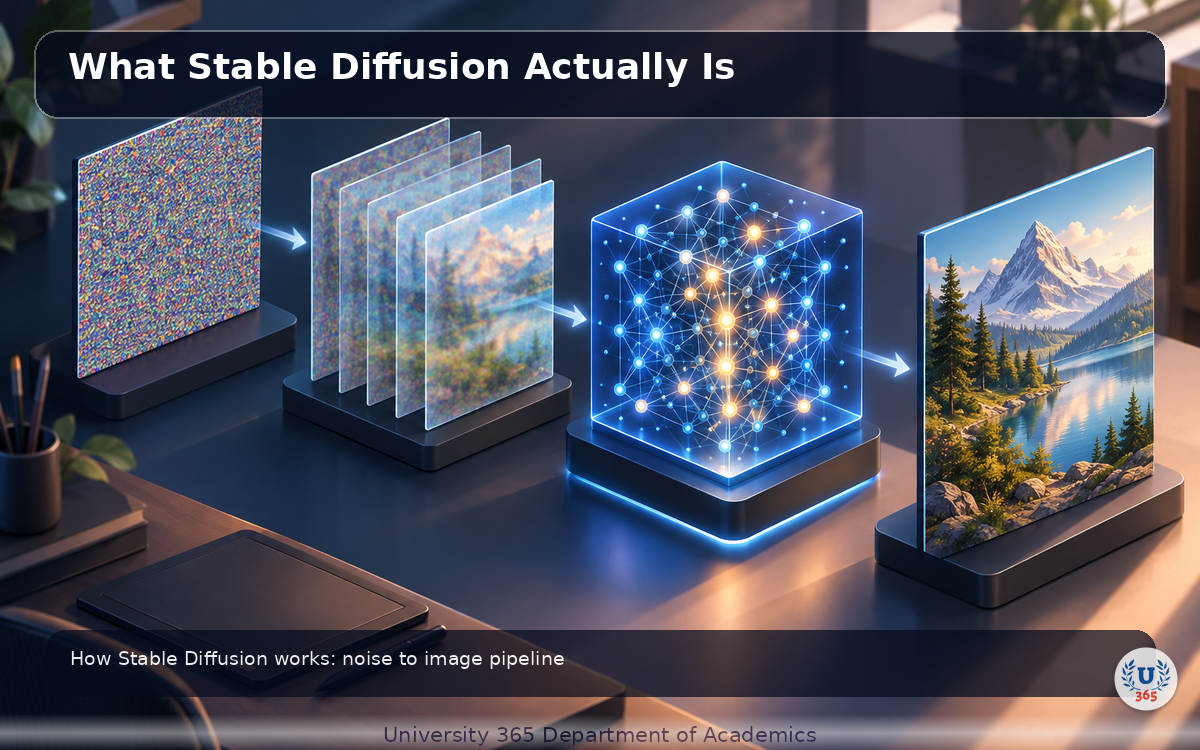
The term "diffusion" refers to the mathematical process. The model learns by gradually adding noise to an image until it becomes pure static, then learning to reverse that process. When you generate an image, the model starts with random noise and progressively removes it, guided by your text prompt, until a coherent image appears.
"Latent" means the model works in a compressed representation space rather than pixel space. This is why Stable Diffusion can run on a consumer GPU with 8 GB of VRAM instead of requiring a data center. The image exists as a compact mathematical representation during generation, then gets decoded into full pixels at the end.
The key difference between Stable Diffusion and closed tools like Midjourney or DALL-E is control. Stable Diffusion gives you access to every layer of the generation process. You can swap models, add conditioning networks, fine-tune on your own data, and build custom pipelines that no API-gated tool allows.
The Core Pipeline: From Prompt to Pixel
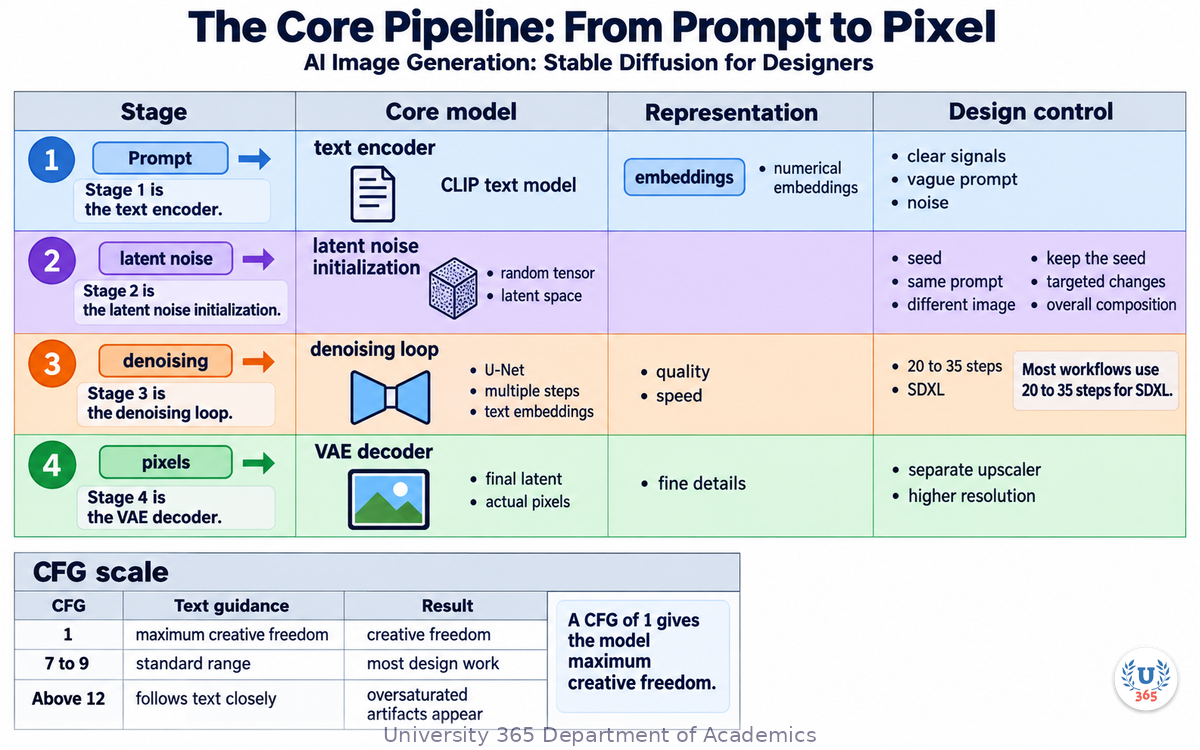
The Stable Diffusion pipeline has four stages. Understanding each stage is the difference between a designer who generates useful assets and one who generates noise.
Stage 1 is the text encoder. Your prompt gets processed by a CLIP text model that converts words into numerical embeddings. These embeddings are vectors in a high-dimensional space where similar concepts sit close together. The encoder determines what the model "understands" from your words. A well-structured prompt gives the encoder clear signals. A vague prompt gives it noise.
Stage 2 is the latent noise initialization. The model starts with a random tensor in latent space. This seed determines the initial state. Change the seed and you get a completely different image from the same prompt. Keep the seed and you can make targeted changes while preserving the overall composition.
Stage 3 is the denoising loop. The U-Net, the core neural network, processes the latent representation in multiple steps. At each step, it predicts how much noise to remove and in what direction. Your text embeddings guide this process. The number of steps controls the trade-off between quality and speed. Most workflows use 20 to 35 steps for SDXL.
Stage 4 is the VAE decoder. The final latent representation gets decoded into actual pixels. This is where your image becomes visible. The decoder quality affects fine details, so some pipelines use a separate upscaler after this stage for higher resolution outputs.
The CFG scale (Classifier Free Guidance) is the single most important parameter after your prompt. It controls how closely the model follows your text. A CFG of 1 gives the model maximum creative freedom. A CFG of 7 to 9 is the standard range for most design work. Above 12, images start to look oversaturated and artifacts appear.
ControlNet: When Text Is Not Enough
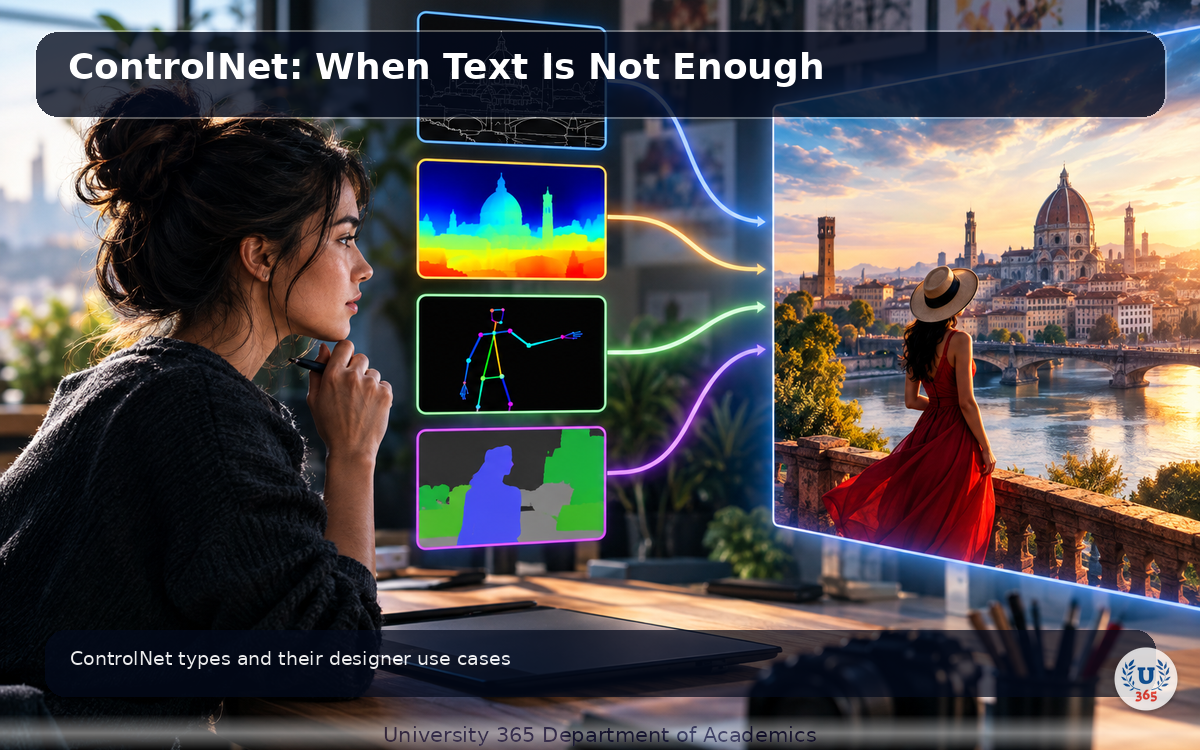
Text prompts have a fundamental limitation for designers: they cannot specify composition. You can write "a woman sitting at a desk" but you cannot control where she sits, what angle the camera uses, or how the furniture is arranged. ControlNet solves this.
ControlNet is a conditioning system that lets you feed structural information into the diffusion process alongside your text prompt. It was developed by Lvmin Zhang and Maneesh Agrawala at Stanford in 2023 and has become essential for professional design workflows.
The main ControlNet types designers use:
OpenPose controls human body positions. You provide a skeleton showing where the head, arms, legs, and torso should be, and the model generates a person matching that pose. This is how designers create consistent character poses across multiple generated images.
Canny edge detection uses the outline of a reference image to guide generation. You give the model an edge map and it fills in the details. This works for transforming sketches into polished renders while preserving your original composition.
Depth maps tell the model how far each part of the scene should be from the camera. This controls perspective and spatial relationships. Designers use it for product mockups where the product needs to sit at a specific depth in the scene.
Scribble is the most direct form of control. You draw a rough sketch and the model refines it into a finished image. For designers who think in sketches, this is the fastest path from idea to visual.
Segmentation maps define which regions of the image belong to which objects. This gives you control over layout without needing to draw precise edges. It works well for interior design and architectural visualization.
The workflow is always the same: generate or provide a conditioning image, select the matching ControlNet model, set the weighting, and generate. The text prompt still controls style and content, but ControlNet controls structure.
LoRA: Teaching the Model Your Style
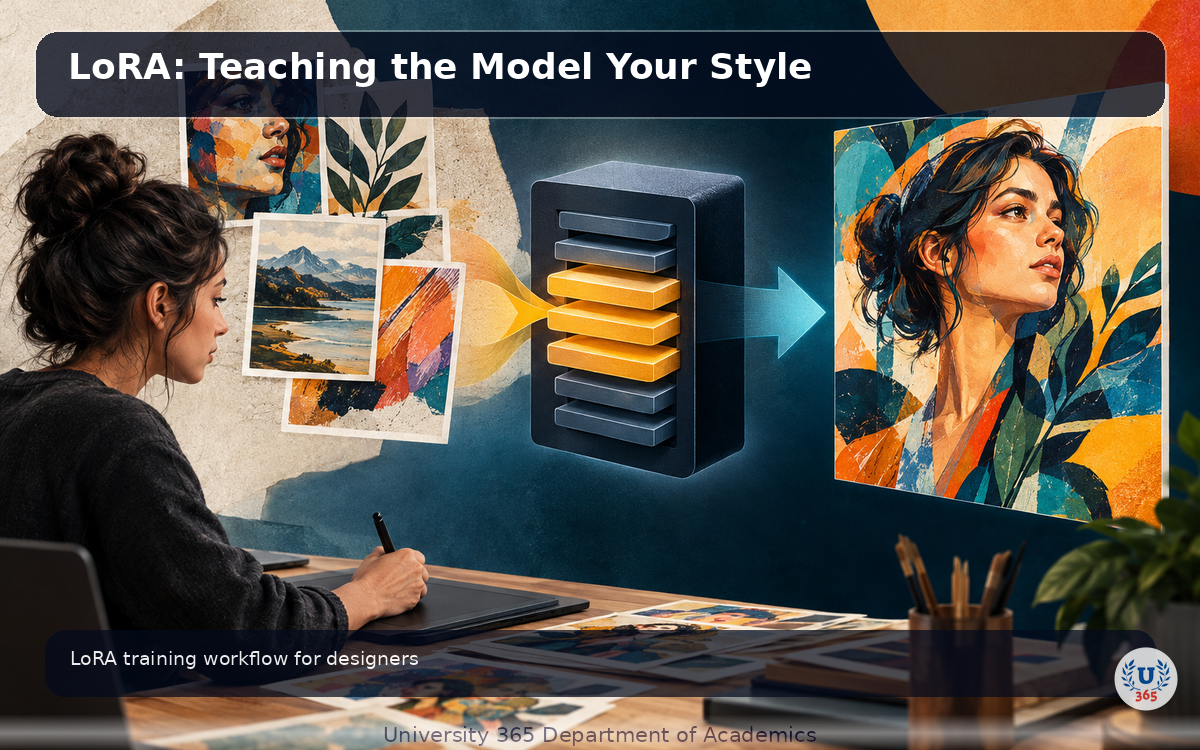
Every design project has a visual language. Brand colors, illustration style, character design, product aesthetics. Out of the box, Stable Diffusion does not know your brand. LoRA (Low-Rank Adaptation) is how you teach it.
LoRA works by training a small set of additional parameters on top of the base model. Instead of retraining the entire 2.6 billion parameter model, LoRA trains a lightweight adapter, typically 10 to 20 million parameters, that modifies the base model's behavior. Training takes 30 minutes to 2 hours on a single GPU, depending on image count and quality targets.
For designers, the practical LoRA workflow is:
Collect 20 to 50 images representing your target style. These can be product photos, brand illustrations, character designs, or any consistent visual reference. Quality matters more than quantity. Curate ruthlessly.
Caption each image with a short text description. Use a consistent trigger word that does not appear in normal prompts. For example, "brandx_style" or "uid_illustration" as a unique token.
Train the LoRA using tools like Kohya_ss, OneTrainer, or ComfyUI's built-in trainer. Most training interfaces have sensible defaults. Start with rank 32, 1500 steps, and a learning rate of 1e-4.
Load the trained LoRA alongside your base model in Automatic1111, ComfyUI, or Forge. Reference it in your prompt with the trigger word and a weight between 0.5 and 1.0.
Test across different prompts to verify the style transfers without overfitting. If every generation looks identical regardless of prompt, your LoRA is overtrained. Reduce the weight or retrain with fewer steps.
The advantage over prompt-only approaches is consistency. A LoRA trained on your brand's illustration style will produce on-brand outputs across any subject matter. You can stack multiple LoRAs: one for style, one for characters, one for backgrounds, each with its own weight.
Practical Workflow for Designers
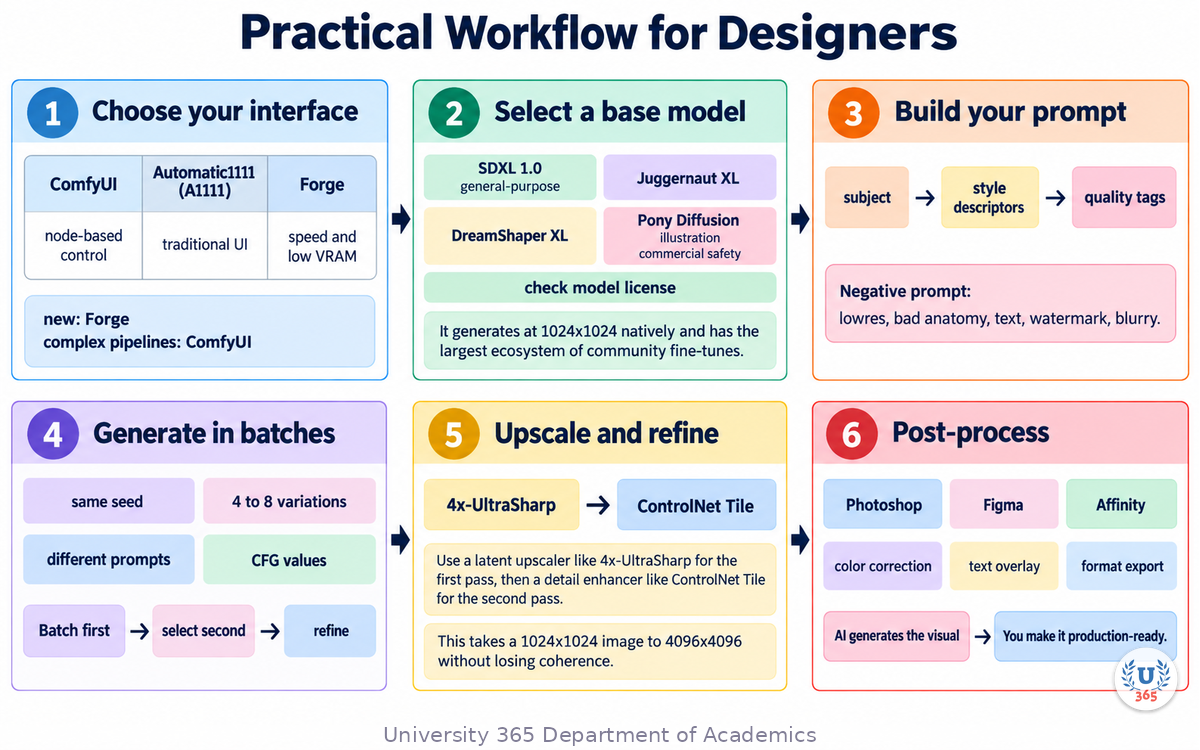
The gap between understanding Stable Diffusion and using it productively is a workflow. Here is the pipeline that working designers use in 2026.
Step 1: Choose your interface. ComfyUI for node-based control and custom pipelines. Automatic1111 (A1111) for a traditional UI with broad extension support. Forge for speed and low VRAM usage. If you are new, start with Forge. If you need complex pipelines, learn ComfyUI.
Step 2: Select a base model. SDXL 1.0 is the standard for general-purpose work. It generates at 1024x1024 natively and has the largest ecosystem of community fine-tunes. For photorealism, try Juggernaut XL or DreamShaper XL. For illustration, use Pony Diffusion or various anime-style models. For commercial safety, check the model license before use.
Step 3: Build your prompt. Start with the subject, then add style descriptors, then quality tags. Keep negative prompts short and specific: "lowres, bad anatomy, text, watermark, blurry." Avoid long negative prompt lists that contradict each other.
Step 4: Generate in batches. Use the same seed across 4 to 8 variations with slightly different prompts or CFG values. Pick the best one, then refine. Never iterate on a single generation. Batch first, select second.
Step 5: Upscale and refine. Use a latent upscaler like 4x-UltraSharp for the first pass, then a detail enhancer like ControlNet Tile for the second pass. This takes a 1024x1024 image to 4096x4096 without losing coherence.
Step 6: Post-process in your design tool. Stable Diffusion outputs are rarely final assets. Bring them into Photoshop, Figma, or Affinity for color correction, text overlay, and format export. The AI generates the visual. You make it production-ready.
Comparing Stable Diffusion with Other Tools
Stable Diffusion is not the only AI image tool. Knowing when to use it versus alternatives is part of being a competent designer in 2026.
Tool | Strength | When to Use | License |
Stable Diffusion | Full control, LoRA, ControlNet, local | Brand-consistent assets, custom pipelines, private workflows | Open (SDXL) |
Midjourney | Artistic quality, ease of use | Mood boards, concept exploration, artistic direction | Commercial subscription |
Adobe Firefly | Integration with Creative Cloud | Production assets in Photoshop/Illustrator, commercially safe | Adobe subscription |
FLUX.1 | Prompt adherence, photorealism | Fast commercial image experiments, high-fidelity outputs | Open (dev) / Commercial (pro) |
DALL-E 3 | Natural language understanding | Quick concepts, iterative ideation inside ChatGPT | OpenAI subscription |
The practical pattern for many design teams is to use Midjourney for early concept exploration, then switch to Stable Diffusion with ControlNet and LoRA for production assets where consistency and control matter. Adobe Firefly handles final commercial work where license safety is the priority.
Stable Diffusion fills the gap between creative exploration and controlled production that no other tool covers. The investment in learning it pays off when a client asks for 50 on-brand variations of a single concept and you can deliver them in an afternoon.
Common Pitfalls and How to Avoid Them
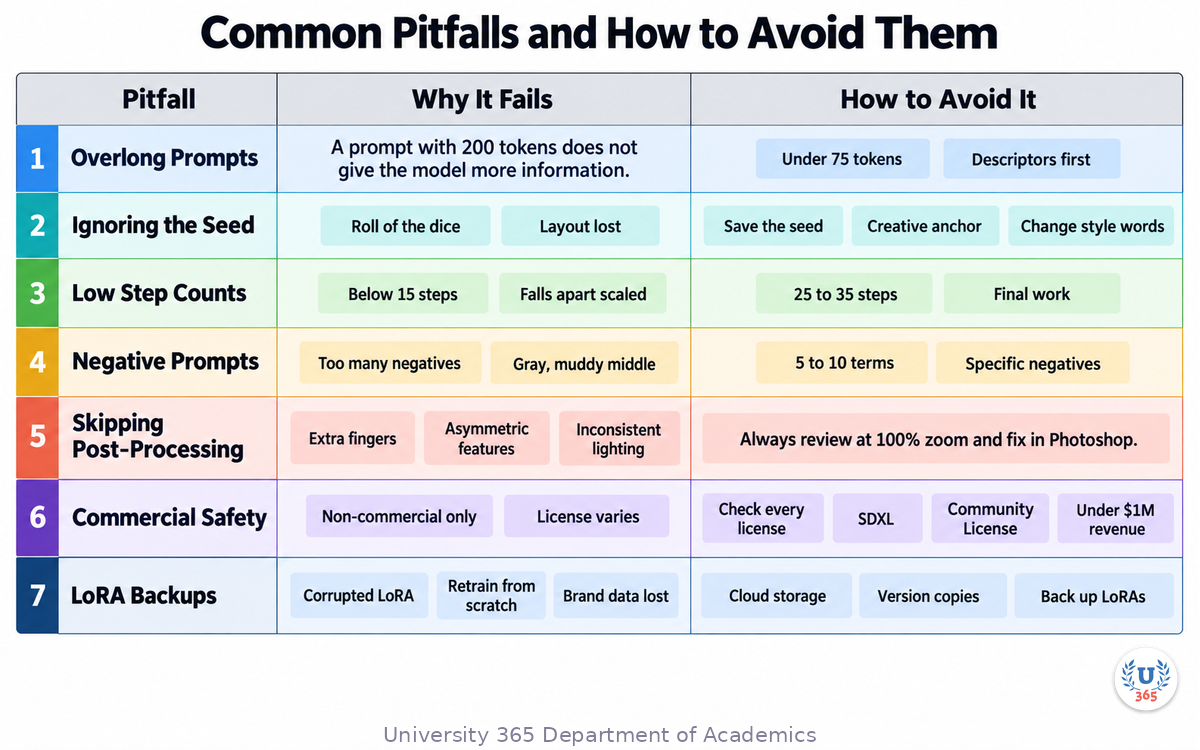
Pitfall 1: Overlong prompts. A prompt with 200 tokens does not give the model more information. It gives it conflicting signals. Keep prompts under 75 tokens. Put the most important descriptors first, where they carry the most weight.
Pitfall 2: Ignoring the seed. The seed is your creative anchor. When you find a composition you like, save the seed. You can then change style words while preserving the layout. Without the seed, every generation is a roll of the dice.
Pitfall 3: Using low step counts for production. Steps below 15 produce images that look acceptable at thumbnail size but fall apart when scaled up. Use 25 to 35 steps for any asset that will appear in final work.
Pitfall 4: Not using negative prompts correctly. Negative prompts are not a dumping ground for everything you do not want. Each negative token pulls the generation away from that concept. Too many negatives create a gray, muddy middle. Use 5 to 10 specific negative terms.
Pitfall 5: Skipping post-processing. AI-generated images have subtle artifacts: extra fingers, asymmetric features, inconsistent lighting. Always review at 100% zoom and fix in Photoshop. No client should ever see an unedited AI generation.
Pitfall 6: Assuming all models are commercially safe. SDXL is released under the Stability AI Community License, which is free for small organizations (under $1M revenue). Check the license of every community fine-tune and LoRA you use. Some are non-commercial only.
Pitfall 7: Not backing up LoRAs. A trained LoRA represents hours of work and proprietary brand data. Store copies in cloud storage and version them. A corrupted LoRA file with no backup means retraining from scratch.
Feynman Summary: Explain It Like You Are 12
Imagine you have a robot that can draw anything you describe. But the robot works in a strange way. Instead of drawing from scratch, it starts with a screen full of TV static, then slowly removes the static step by step until a real picture appears. Your words tell the robot what to remove and what to keep.
Stable Diffusion is that robot. You type a description, and it starts with static noise, then cleans it up over about 30 steps until your image appears. The more clearly you describe what you want, the better the robot understands which parts of the static to keep and which to throw away.
ControlNet is like giving the robot a coloring book outline. Instead of guessing where things should go, the robot fills in your outline. You draw where the person should stand, and the robot draws the person standing there.
LoRA is like teaching the robot a new art style. You show it 30 pictures of your favorite artist's work, and it learns to draw in that style. Now when you ask for anything, it can draw it in that style automatically.
The catch is that the robot needs practice. Your first attempts will look weird. But once you learn how to talk to it clearly, give it good outlines, and teach it the right styles, it becomes the fastest drawing assistant you have ever had.
Mindmap: The Complete Picture
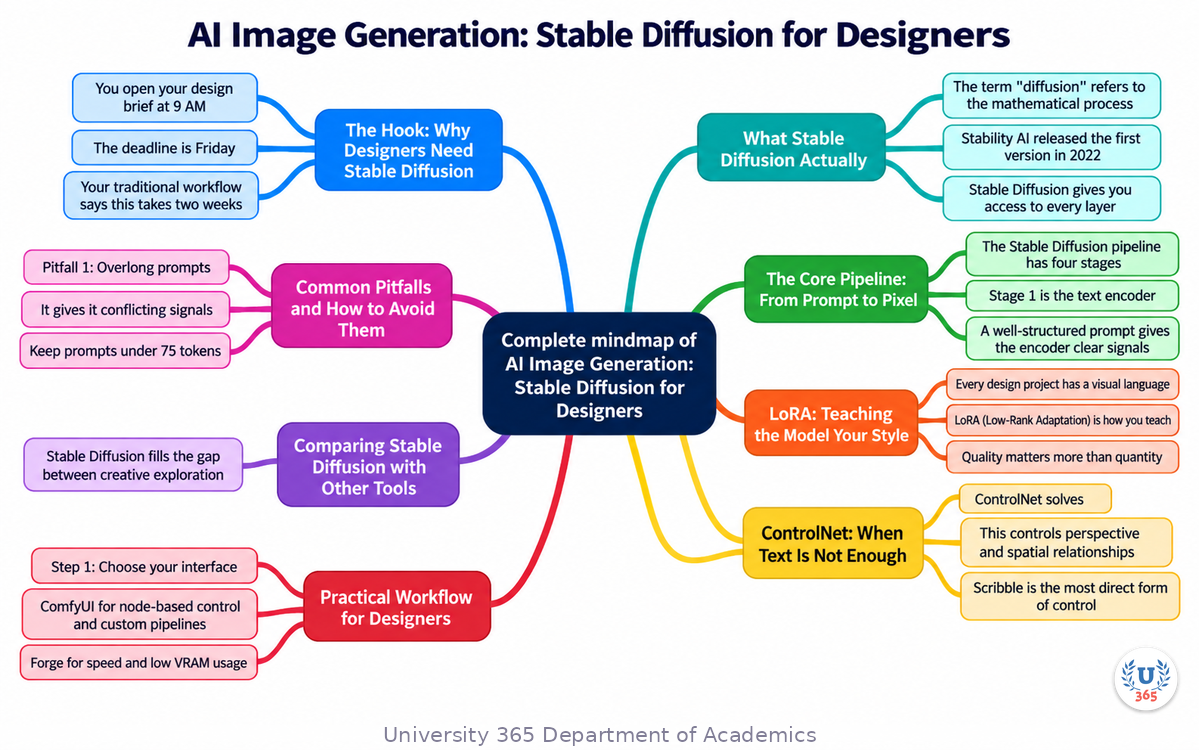
This mindmap shows the full Stable Diffusion ecosystem for designers. The center node is Stable Diffusion itself. Five branches extend outward: the core pipeline (text encoder, latent noise, denoising loop, VAE decoder), ControlNet conditioning (OpenPose, Canny, Depth, Scribble, Segmentation), LoRA fine-tuning (collect, caption, train, load, test), the practical workflow (interface, model, prompt, batch, upscale, post-process), and tool comparisons (Midjourney, Firefly, FLUX, DALL-E).
UNOP Sound (University 365 Neuroscience Oriented Pedagogy)
Take five minutes to consolidate your memory. Play the isochronous tone track (10Hz alpha frequency) with your eyes closed. Alpha-frequency tones after a learning session support consolidation, helping move what you just learned from short-term to long-term memory.
[Audio player: UNOP Post-Lecture Isochrone (10Hz, 5 minutes)]
Practical Exercise: Generate a Brand Asset
This exercise takes 30 minutes and requires a computer with at least 8 GB VRAM or access to a cloud GPU service.
Objective: Generate a set of 4 brand-consistent hero images for a fictional coffee brand called "Morning Forge" using Stable Diffusion.
Step 1: Install Forge or ComfyUI. Download an SDXL base model from Hugging Face or Civitai. Place it in the models/Stable-diffusion folder.
Step 2: Write your base prompt: "professional product photography of a coffee bag on a wooden table, morning light, warm tones, shallow depth of field, commercial quality, 50mm lens"
Step 3: Set your parameters: 1024x1024, CFG 7, 30 steps, DPM++ 2M Karras sampler. Generate 8 images with different seeds.
Step 4: Select the best 2 compositions. Save their seeds.
Step 5: Add ControlNet Depth with a simple depth map showing the coffee bag in the center. Regenerate with the saved seeds. Compare the results to step 3.
Step 6: If you have a LoRA trained on a specific visual style, apply it at weight 0.7. If not, try a community style LoRA from Civitai at weight 0.5.
Step 7: Upscale your 2 best images using 4x-UltraSharp. Export at 2048x2048.
Step 8: Open in Photoshop or your preferred editor. Add the "Morning Forge" logo text. Adjust colors. Export as PNG.
Deliverable: 4 hero images at 2048x2048, each using the same brand prompt but different seeds and conditioning. The images should look like they belong to the same brand campaign.
Glossary
Term | Definition |
Latent Diffusion | A diffusion process that operates in a compressed latent space rather than pixel space, enabling generation on consumer hardware. |
ControlNet | A conditioning system that feeds structural information (pose, edges, depth) into the diffusion process alongside text prompts. |
LoRA | Low-Rank Adaptation. A technique for fine-tuning a diffusion model by training a small set of additional parameters on top of the base model. |
CFG Scale | Classifier Free Guidance. A parameter controlling how closely the model follows the text prompt. Standard range is 7-9. |
VAE | Variational Autoencoder. The component that decodes the latent representation into visible pixels. |
U-Net | The core neural network in Stable Diffusion that performs the denoising loop. |
Seed | The random number that initializes the latent noise. Same seed plus same prompt produces the same image. |
SDXL | Stable Diffusion XL. The 1024x1024 native resolution model released by Stability AI. |
ComfyUI | A node-based interface for Stable Diffusion that allows building custom generation pipelines. |
Automatic1111 | A web-based interface for Stable Diffusion with broad community extension support. |
Inpainting | A technique for regenerating specific regions of an image while preserving the rest. |
Negative Prompt | Text describing what the model should avoid generating. Used to suppress unwanted features. |
Quiz: TEST YOUR UNDERSTANDING
What does "latent" mean in the context of Stable Diffusion?
A) The model works with hidden layers only
B) The model operates in a compressed representation space, not pixel space
C) The model generates images secretly without user input
D) The model uses latent variables for color correction
Which ControlNet type would you use to control where a person's arms and legs are positioned in a generated image?
A) Canny
B) Depth
C) OpenPose
D) Segmentation
What is the recommended CFG scale range for most design work?
A) 1 to 3
B) 7 to 9
C) 15 to 20
D) 25 to 30
How many images are typically needed to train a LoRA for a brand style?
A) 1 to 5
B) 20 to 50
C) 500 to 1000
D) At least 5000
Which statement about Stable Diffusion licenses is correct?
A) All Stable Diffusion models are free for any commercial use
B) SDXL is free under the Community License for small organizations, but check each fine-tune's license
C) Stable Diffusion requires a paid subscription for any use
D) Community LoRAs are always commercially safe to use
Answers: 1-B, 2-C, 3-B, 4-B, 5-B
Related Resources
U365 INSIDE Publications
How LLMs Actually Work: Transformers in 20 Minutes - Understand the language models that power text-to-image encoders
External Resources
Stability AI Official Documentation - Official API docs and model information
Civitai - Community models, LoRAs, and fine-tunes
Hugging Face Diffusers - Python library for running diffusion models
ComfyUI GitHub - Node-based Stable Diffusion interface
ControlNet Paper (Zhang et al., 2023) - Original ControlNet research
Related U365 Lectures (Coming Soon)
Design Systems Powered by AI (Creative Technology Series, Lecture 4)
Generative Brand Identity (Creative Technology Series, Lecture 8)
AI in Web Design: From Wireframe to Deployed Site (UX/UI Series, Lecture 9)
U.Copilot for This Lecture
Copy and paste the following prompt into the U.Copilot AI agent on university-365.com to continue exploring this topic:
I just completed the UID lecture "AI Image Generation: Stable Diffusion for Designers." I want to go deeper on ControlNet and LoRA workflows for my specific design discipline. Can you help me: 1. Identify which ControlNet types are most useful for my field (UX/UI, motion graphics, visual communication, or brand design) 2. Outline a LoRA training plan for a specific brand style I want to replicate 3. Recommend a Stable Diffusion interface based on my hardware and experience level 4. Explain how to integrate Stable Diffusion outputs into my existing design tools (Figma, Adobe CC, etc.)
Next Steps
Install a Stable Diffusion interface (Forge for beginners, ComfyUI for advanced users) on your machine or a cloud GPU service.
Download an SDXL base model and generate your first 20 images with different prompts and seeds.
Pick one ControlNet type relevant to your design work and practice with 10 generations using conditioning images.
Collect 20 to 30 images of a brand or style you want to replicate. Prepare them for LoRA training.
Enroll in the UID Creative Technology program at university-365.com/uid to access hands-on labs, instructor feedback, and a community of designers working with AI tools.
Read the next lecture in this series: "Design Systems Powered by AI" to learn how Stable Diffusion integrates into systematic design workflows.
IMPORTANT NOTICE
Copyright University 365, Inc. All rights reserved.
This lecture is part of the UID (University 365 Institute of Design) Creative Technology series. It is published as a free educational resource under the 5M2S (5 Minutes to Success) and UNOP (University 365 Neuroscience-Oriented Pedagogy) formats.
For enrollment in UID programs, visit university-365.com/tuition. For permissions or inquiries, contact uda@university-365.com.
The educational content in this lecture is current as of September 2026. AI image generation tools evolve rapidly. Verify current model versions, licensing terms, and technical specifications before using any tool in commercial work.
Published by the Department of Academics, University 365.
Lecture delivered by the University 365 Institute of Design (UID).
Joe Borazian, Dean of Design, UID
Signed for the academic year 2026.




Comments